

Introduction
Selling online in India has never been easier, or more competitive. Thousands of small sellers open a store every day. The stores that take off are rarely the ones with the best product. They are the ones with the right platform, clear costs, and easy payments.
This guide shows how to build an ecommerce website in India in 2026, step by step. We compare the three realistic routes, Shopify, WooCommerce, and Indian SaaS platforms, and cover the parts most guides skip.
Step 1: Decide What You Are Selling and Who You Are Selling To
Before you compare platforms or buy a domain, answer the basics. What are you selling: physical products, digital products, or services? How many products will you launch with: 10, 100, or 1,000? Who is your buyer: price sensitive mobile shoppers or premium buyers? Where will you ship: one city or across India? A store with 20 products needs a very different setup from one with 2,000. If you are deciding between building it yourself and hiring help, read our guide on how to choose a web development company in India first.
Step 2: Choose Your Platform: Shopify, WooCommerce, or an Indian SaaS Platform
There are three practical routes, and none is right for everyone.
Shopify: The Fastest Route
Shopify is the most popular hosted ecommerce platform in the world, and it works well in India. You pay a monthly subscription, pick a theme, add products, connect a payment gateway, and you are live. There is no server management, and the checkout is already optimised for conversions. Its app store covers GST invoicing and shipping labels. The downside is cost: the monthly fee, transaction charges, and paid apps add up.
WooCommerce on WordPress: The Most Flexible Route
WooCommerce is a free plugin that turns a WordPress site into a full online store. You pay for hosting and a domain, and you own everything: the design, the data, and the checkout. There are no monthly platform fees beyond hosting, and thousands of plugins cover payments, shipping, and GST invoices. The downside is responsibility: you manage hosting, backups, updates, and security yourself, or you pay someone to do it.
Indian SaaS Platforms: The Budget Friendly Route
Platforms built for India, such as Dukaan and Bikayi, offer very low cost store builders for small sellers and Instagram businesses. Many start free or at a few hundred rupees a month, include UPI payments, and let you set up a store from your phone. The downside is limited design control, fewer integrations, and weaker SEO tools, and moving your store later can be difficult.
Choose Shopify for speed, WooCommerce for control, and an Indian SaaS platform for a low cost start.
Step 3: Understand the Real Cost in INR Before You Start
Most guides quote a single price. The reality is a stack of costs. The table below shows typical approximate ranges in rupees for a small store. Treat these as planning ranges, not guaranteed prices.
| Cost item | Shopify (approx.) | WooCommerce (approx.) | Indian SaaS platform (approx.) |
|---|---|---|---|
| Platform or hosting per month | Rs. 2,000 to Rs. 8,000 | Rs. 300 to Rs. 1,500 hosting | Rs. 0 to Rs. 1,500 |
| Domain per year | Rs. 800 to Rs. 1,500 | Rs. 800 to Rs. 1,500 | Rs. 800 to Rs. 1,500 |
| Theme | Rs. 0 to Rs. 15,000 one time | Rs. 0 to Rs. 6,000 one time | Included |
| Payment gateway charges | 2% to 3% per transaction | 2% to 3% per transaction | 2% to 3% per transaction |
| SSL certificate | Included | Usually included with hosting | Included |
| Total first year, typical small store | Rs. 35,000 to Rs. 1,20,000 | Rs. 8,000 to Rs. 40,000 | Rs. 2,000 to Rs. 25,000 |
Watch for cost traps: paid Shopify apps that renew every month, premium WooCommerce extensions, and gateway setup fees. For more detail, see how much a website costs in India in 2026.
Step 4: Register Your Business and Sort Out GST
You can start as a sole proprietor, but get the paperwork right early. Get a GST number if your turnover crosses the registration threshold, if you sell across state lines, or if a marketplace or payment gateway requires it. Open a current account in your business name for gateway settlements. Keep your PAN, Aadhaar, address proof, and bank details ready for KYC and GST registration. Ask a chartered accountant about GST rates, input tax credit, and invoicing before you launch.
GST invoicing is not optional once you are registered. Your store must generate GST compliant invoices, show tax correctly at checkout, and file returns on time. Shopify and WooCommerce have GST invoicing plugins, and Indian SaaS platforms usually include basic GST invoices. Test an invoice before you launch.
Step 5: Set Up Payments: UPI, Cards, Net Banking, and COD
Payments decide whether a visitor becomes a customer. In India, that means UPI first.
Get a Payment Gateway
Razorpay, PayU, Cashfree, and CCAvenue are the most common gateways for Indian stores. Shopify supports third party gateways, WooCommerce works with them through official plugins, and Indian SaaS platforms usually bundle one. KYC is similar everywhere: submit your business PAN, identity proof, and address proof; provide your GST number if registered and your current account details; and add your website URL and business description, because gateways review the site. Verification usually takes 1 to 5 working days. Charges are typically around 2% to 3% per transaction, plus GST on the fee.
UPI: Your Most Important Payment Method
UPI is the default way millions of Indians pay online. Make it prominent at checkout and test it with Google Pay, PhonePe, and Paytm.
Cash on Delivery: Offer It, But Understand the Cost
Cash on delivery, or COD, still drives a large share of orders for many Indian stores, especially outside metro cities. Customers who do not trust a new store often choose COD for their first order, so offering it can raise conversions. But COD has real costs. Return to origin, or RTO, is the biggest one: many COD orders are refused at the door or never collected, and you pay the shipping both ways. Manage COD sensibly: charge a small COD fee, or offer a small discount for prepaid orders. Confirm COD orders by phone or WhatsApp before dispatch, because a 30 second call cuts RTO sharply. Limit COD to pincodes you can serve reliably and track your RTO rate weekly.
Step 6: Arrange Shipping with Shiprocket and Delhivery
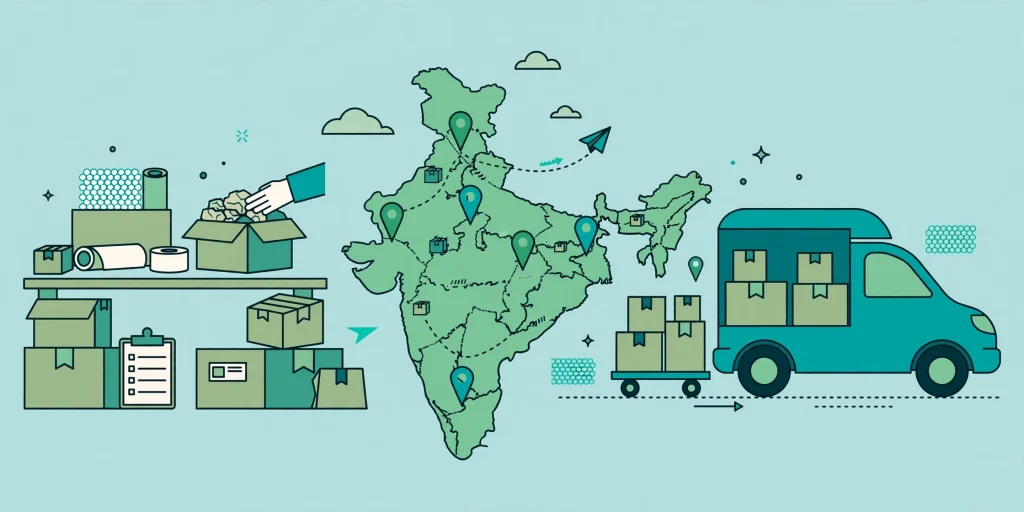
Shipping is where many new sellers lose money, so plan it before launch. Shiprocket is an aggregator that lets you compare rates across courier partners, print labels, and track orders from one dashboard. Delhivery is a large courier network with strong coverage across India. Both integrate with Shopify and WooCommerce. Decide your shipping zones and rates before launch: free shipping above a threshold, such as Rs. 999, encourages larger baskets. Weigh and measure every product, including packaging, and enter accurate weights in your store. Choose couriers by pincode performance, not by headline rate.
Step 7: Build Product Pages and Take Photos That Sell
Your product page is your salesperson, and most shoppers decide within seconds. Write a clear title with the product and its key variant, such as size or colour. Write a unique description for every product and never copy a supplier or competitor page. Explain who the product is for and what is included in the box.
Use at least 4 to 6 photos per product: front view, side view, close up, size comparison, packaging, and the product in use. Show the price clearly, including GST, and show the MRP with a strike through price only when the discount is genuine. Add a size guide for clothing, show stock status honestly, and add customer reviews once you have them.
You can use AI tools to draft product descriptions faster, and for a store with hundreds of products that is a sensible way to work. But always verify every AI drafted description before publishing. AI tools invent specifications, sizes, and materials that do not exist, and a wrong specification leads to returns. Check the facts and make sure the description matches the actual product.
Step 8: Add the Trust Pages Every Indian Store Needs
New stores fail on trust more than on traffic. Before you spend a rupee on ads, publish these pages and link them in your footer: About Us, with who you are and why you started; Contact Us, with a working email, a phone or WhatsApp number, and your business hours; Shipping Policy, with delivery timelines and charges; Returns and Refunds Policy, with the return window and refund timelines; Privacy Policy; and Terms and Conditions. Display trust signals on product and checkout pages, such as secure payment badges. Keep them truthful, because a fake badge destroys trust faster than no badge at all.
Step 9: Design for Mobile First, Then Run the Pre Launch Checklist
More than 80% of Indian ecommerce traffic comes from mobile phones, often on mid range devices and patchy networks. Pick a theme that is genuinely responsive and test it on a real phone. Keep the homepage simple, make the buy buttons large and easy to tap, keep the checkout short, and compress images before uploading. Test your store on a 4G connection, not just on office Wi-Fi.
Do not launch on a hope. Work through this checklist first: place a real test order with UPI and with a card, then refund it, and confirm the payment, the order email, and the settlement; place a COD test order; test shipping labels, tracking links, and the order confirmation message; check every product page on a mobile phone; check every link in your header, footer, and menu; test your contact form and WhatsApp button; check your GST invoice details; and ask two new visitors to place an order and tell you where they got confused. Only when every item passes should you announce the launch.
Step 10: SEO Launch Essentials for Your New Store
A beautiful store with no search visibility is an empty shop on a quiet street. Set a unique SEO title and meta description for your homepage, every category page, and every product page. Write unique product descriptions, because duplicate descriptions copied from suppliers rank poorly. Add product schema markup so Google can show price and availability in search results. Create an XML sitemap and submit it in Google Search Console. Use clean URLs, add internal links from your blog to your product pages, and keep your site fast. For a full walkthrough, see our guide on ecommerce SEO for Indian online stores.
Conclusion
Building an ecommerce website in India in 2026 is about matching the platform to your business, understanding the real costs in rupees, sorting out GST and payments, and earning trust one order at a time. Shopify gives you speed, WooCommerce gives you control, and Indian SaaS platforms give you a low cost start. Start small, launch with a tight catalogue, and test payments and shipping with real orders.
Frequently Asked Questions
How much does it cost to build an ecommerce website in India in 2026?
A small store typically costs Rs. 8,000 to Rs. 40,000 in the first year on WooCommerce, Rs. 35,000 to Rs. 1,20,000 on Shopify, and Rs. 2,000 to Rs. 25,000 on an Indian SaaS platform. These are approximate ranges.
Do I need GST registration to start an online store in India?
You need GST registration if your turnover crosses the threshold, if you sell across state lines, or if a payment gateway requires it.
Which is better for an Indian seller, Shopify or WooCommerce?
Shopify is better for a fast launch with minimal technical work. WooCommerce is better for full control and lower long term costs.
Can I accept UPI payments on my ecommerce website?
Yes. All major Indian payment gateways support UPI, and Shopify and WooCommerce both integrate with them. Make UPI prominent at checkout and test it with Google Pay, PhonePe, and Paytm.
Should I offer cash on delivery on my store?
Offering COD can raise conversions, because many Indian shoppers trust it for a first order. But COD orders have higher return rates, and you pay shipping both ways. Confirm COD orders by phone or WhatsApp before dispatch.
How do I ship products across India as a small seller?
Use an aggregator like Shiprocket to compare courier rates and manage labels and tracking, or a large courier network like Delhivery for wide pincode coverage. Enter accurate product weights.
How long does it take to build an ecommerce website in India?
A basic store on Shopify or an Indian SaaS platform can be live in 3 to 7 days if your product photos and descriptions are ready. A WooCommerce store typically takes 1 to 3 weeks. Payment gateway KYC can add 1 to 5 working days.

3 Comments
Pingback: Best Hosting in India 2026: 9 Hosts Compared
Pingback: How to Create an Online Course Website in India 2026: Platforms, Costs and Payments
Pingback: How to Create a Restaurant Website in India 2026: Platforms, Costs and Online Ordering